Auto-SummaryThis post is a public journal documenting the author's mushroom cultivation process, from agar to bulk, with an emphasis on practicality, streamlining, and long-term projects. It includes updates on various aspects of the cultivation process, such as potency, "stalled" jars, casing, grain-to-grain transfer, and clones. The post also provides a list of supplies, success reminders, safety and sterility notes, and instructions for printing and cloning. The author encourages readers to share their unique methods and experiences while maintaining cleanliness and sterility.
Change log
This section of the OP is dedicated to the change history of the OP. Most people don't do this, fucking annoying
- 10-11-2025 - Updated: Potency is subjective
- 10-08-2025 - Added: "Stalled" jars
- 10-07-2025 - Added: Things you should do that I don't (Appendix post #3)
- 10-06-2025 - Added: Unmodified tub condensation and wiping
- 10-02-2025 - Added: Prints on microscope glass sides | Pretri dish cuts sent to grain | Large tote cardboard inserts | Swab cuts
- 10-01-2025 - Added: Grandma's lemon tek tea
- 09-30-2025 - Added: Casing | Field Capacity Regulation and Check | Full Retro Top Fruiting | Bulk Stacking | Cloning and Field Cloning
- 09-29-2025 - Fixed a shit ton of notes
- 09-28-2025 - You can find this post again by searching "yz8fafcno92filth" a randomly generated string that will help the search engine
Readme
tldr
A public journal of how I get shit done in a format where the print button on the bottom of the OP produces an increasingly high quality guide. At first it will be fairly useless and trivial but as projects expand and my experience this will become, hopefully and incredible resource of various things.

Post format
Post #1 - Text
Post #2 - Reserved for photos
Post #3 - Reserved for appendix
Post #4-? - shit posting and feedback
Audience
Adults with a sense of humor. New cultivators and people with OCD. People that want to grow mushrooms for medicine and are having a hard time navigating this cash cow of a site.
Interest in understanding build order from agar > grain > bulk without hyper fixation on perfection of the flush outcome or photography. Ability to flex up (large totes) or down (jars) with ease due to upfront one-time and bulk consumables investment. Less corners skipped on sterility practices. Long-term interest in genetic preservation.
Warning
This post will use will use graphical language as I find having a sense of humor is easier to read, write, and edit than reading a boomer scientific magazine. It's also my personally, fairly vulgar.
This post will include anecdotal findings and not match scientific factual reality. It's how I do and currently see my own process encompassing mushroom cultivation. Your more than welcome to shit post as that will help me reparse my efforts and process, it doesn't mean I will find your determination(s) fact. In many cases I'll probably disagree with you do to my own ego and lack of field experience in cultivation in general.
There will be a lack of context in many places in posts #1-3. Use the search engine for more information.
Go back and update your OPs and do better, it doesn't take that much time. Stop pretending like it takes days and days to make something a little better. I'm fucking tired of reading "we do this for free, fuck off". Do better. Help cultivate mushrooms in your own unique specific ways and be verbose as fuck as how you go about that. You do you.
mush love
I've achieved my initial goal of a life-long never ending supply of mushrooms to use as a antihistamine medication. Quitting my asthma medications cold turkey 5 years ago has been a hell of a ride and the shroomery I have to thank for the conclusion of that process, its current and previous administration, and the countless plebs that keep this place alive, however they can. Thank you.
They say not a single person has ever been cured of asthma and that is certainly true. I'm not curried but have regained my life back and am strong as fuck now for everything I've put myself through to get here.
Environmental notes
Humid continental climate zone, which features warm summers and cold winters with moderate to high precipitation throughout the year.
09-28-2025 - A literal field mouse was observed running across my large totes 2 days ago. I work in a filthy environment folks. If any of my process seems strange to you, try not to think too hard about it and move along. Maybe shit post before you leave.
Project preferences
Agar, SAB, Grain, Jars, optional tools that make long-term projects stream-lined
Process Overview
1. Order spore print from a trusted vendor
2. Make agar
3. Transfer spores to agar
4. T1-T3 on agar
5. T3 agar to grain spawn jars
6. Coir prep
7. Full Retro Top Fruiting
8. Questionable grain spawn colonization to small plastic totes
9. Genetics preservation and testing from #7 and #8
10. Fully colonized grain spawn to bulk in large plastic totes
11. Bulk fruit genetics preservation
12. Cloning back to agar
13. Repeat #4-12
14. Repeat #1 after "mastering" (lol) a specific genetics line
Master Supplies List
Universal Appliances
1. Microwave
2. Refrigerator
3. Gas Range Stove
4. Water distiller
Consumables
5. Tin Foil
6. Cling Wrap (yeah get fucked team parafilm)
7. Paper towels
8. Spray bottle #1 - 1 drop Dish soap / distilled water
9. Spray bottle #2 - Isopropyl Alcohol 70% (ISO)
10. Spray bottle #3 - 1 part bleach / 10 part distilled water
11. White Vinegar (cleaning strength version)
12. Glass microscope slides / cases
13. Masking tape
14. Cardboard
15. Chalk markers, reusable jar labels
16. Distilled water
Universal Tools
17. Jar Wrench
18. USB-C Light(s)
19. Rectangular Non-Stick Cooling Rack (SAB floor)
20. Wire Storage Basket with Adhesive Backing (SAB Stand)
21. Grout Floortile float (leveling totes)
22. Drill
Mycology tools
23. Mycology set (Scalpel, scissors, inoculation loop)
24. Torch
25. Alcohol Burner Lamp (5.07oz)
26. Ethyl Alcohol 99.5% Denatured Alcohol (for #17)
27. Monotub 54q
28. Still Air Box - 74 Quart (SAB)
29. Flow Hood - 12"x12" (FH) (no use for this currently)
Agar Making Supplies
30. Funnel
31. Filters
32. 500ml media bottles with GL45 screw cap
33. GL45 screw cap replacements
34. Gram scale
35. Pressure cooker (PC) (All American 930 30 qt)
Agar Consumables
36. Agar-Agar bulk
37. Golden Light Malt Extract (GLME)
Agar Specific Supplies
38. Water bath
39. Infrared thermometer
40. Petri Dishes bulk (60x15mm plastic)
41. Petri Dishes (60x15mm cheap Borosilicate glass)
42. Stainless Steel Carrying Rack for 100 mm Lab Petri Dishes
Agar to Grain Supplies
43. Mason Jars - Wide Mouth
44. Plastic Lids - The white shitty ones
45. Synthetic Filter Paper Stickers
Substrate Supplies
46. Coir from trusted sources (normal use)
47. Coir from random shady places
48. Insulated mixing jug - 5 Gallon
General Success Reminders
Cleaning
- Bleach deep clean
- ISO sanitize
Outside the SAB
- Wipe things prior to entering SAB (ISO)
- Knock loose the grain of the master jars
Hygiene
- Clean shirt
- Wash hands / arms
Prepare SAB
- ISO wipe (everything but the floor)
Inside the SAB
- Wipe things again after entering SAB (ISO)
- Work towards back, avoiding work near arm holes
- Work diligently with deliberate movements
- Keep hands from hovering over the lids, open jars and sterile containers at all times
- When wiping jars with ISO make sure to get under rim
- Master lid gets placed on a free receiving jar or ISO soaked paper towel
- Use the clam-shell method with petris and receiving jars
Safety and Sterility Notes
- Do not touch plate rims or inside surfaces with gloves
- Always work slowly to minimize air turbulence
- Maintain cleanliness across all transfer steps
- Disinfect gloves frequently throughout the process
Prints and Swabs
Working with Swabs
- Pre-open the swab pack in the SAB and set on rack next to receiving agar plate
- Not yet exposing the swab, just making sure its easily adjustable with one hand
- flame sterilizing my small field surgical scissors
- with my left hand / thumb poking the swab out of the package
- while with the same hand clam-shelling the receiving plate
- finally with my right hand cutting of a small amount of swab fibers onto the plate
Working with Agar
Make agar
1. Prepare PC:
- Place empty, clean Agar media bottle(s) in PC
- Fill with tap water to the bottom lip of the 250ml on Agar media bottle(s)
- Add .5 cup white vinegar to keep things clean
2. Add dry ingredients to glass round media storage bottle:
3. Fill storage bottle with distilled water just above 400ml.
4. Cap (tightly) and Shake. Loosen cap (slightly). Place in PC.
5. Repeat #4 every couple minutes while PC warms.
6. Loosen cap (very). Microwave to boil, watching closely for boil over. Cap tightly and Shake.
7. Loosen cap (slightly), cover with Tin Foil. Place in PC.
8. Sterilize at 15PSI for 20 minutes.
9. Wait for PC to reach 0. Remove lid to PC, Tighten cap to bottle, remove tin foil.
- Store at stable room temperature unless using right away
Pouring Agar Plates in a SAB and print transfers
Purpose
This SOP outlines the step-by-step procedure for safely and aseptically pouring agar plates in a SAB to prevent contamination during medium preparation.
Applicable to individuals preparing sterile agar plates in home lab environments using non-pressurized air-clean environments such as a SAB.
This procedure doubles as spore print transfers to agar.
Materials and Supplies
Pre-sterilized receiving plates
Scissors
Inoculation loop (if applicable)
Prepared agar
SAB
Spray bottle #1 - Soap Water
Spray bottle #2 - ISO
Clean short-sleeved shirt
Nitrile gloves
Cling wrap (pre-cut @ 1")
Paper towels
Procedure
1. Remove agar from shelf:
- Loosen the cap (slightly)
- Place in Water Bath at 93c
- Wait for agar to melt (105 minutes)
2. Reduce Water Bath heat to 60c
- Wait for agar to cool (xx minutes)
3. Prepare SAB
- Turn off all sources of airflow except HVAC
- Computer
- Fans
- Deploy baby gate to prevent free-ranged house animals from entering the lab (lol)
- Place a jar of ISO outside the SAB (left) for sanitation of tools (scissors, inoculation tool (if applicable))
- Submerge tools in ISO jar
- Prepare and set aside bottles (#1 & #2) and paper towels
- Prepare Alcohol Burner Lamp
- Charge USB-C light(s) and set on SAB (I work at night mostly and its dark AF)
4. Personal Clean-Up and Set-Up
- Wash hands and forearms thoroughly with soap and water
- Wear a clean, short-sleeved shirt
- Put on gloves and disinfect with ISO
- Wipe down forearms with ISO
5. Sanitize Inside of SAB
- Wipe down sides/top surfaces of SAB using ISO
- Wipe down stands in SAB
- Wipe down soap water bottle with ISO
- Mist soap water inside of the SAB
6. Sanitize Equipment and Supplies
- Transfer tools: Flame sterilize (outside SAB!), allow to cool, then submerge in ISO jar
- Sanitize each item with ISO and place into SAB one at a time:
- Receiving plate sleeve(s) un-opened
- Agar media bottle
- Cling wrap
- Tin foil spore print, folded still in bag (if applicable)
7. Final Prep Inside the SAB
- Wipe gloves with ISO
- Soak a clean paper towel with ISO and Re-enter SAB
- Wipe everything down again with ISO (don't fuck with the walls, everything else though)
- Prepare plates
- Remove scissors from ISO jar
- Cut top of plate sleeve(s). Set scissors back in ISO jar
- Re-wipe gloves with ISO
- Remove plates from sleeve(s) and discard sleeve
- Re-wipe agar jar
- Re-wipe gloves
8. Pour Agar Plates
- Open the agar jar inside SAB and set lid on the ISO soaked paper towel
- Lift the entire plate stack to access the bottom plate
- Pour agar into the bottom plate (clam-shell method)
- Replace lid on the poured plate
- Continue pouring upwards through the stack
- Repeat for other stacks (if applicable)
9. Let agar settle 30 minutes
10. Inoculate (if applicable) or wrap
- Replace cap on agar media bottle, tighten
- Proceed to inoculation procedure (if applicable)
- Wrap with cling wrap
- Wrap plates from top to bottom with cling wrap, one plate at a time
11. Clean-Up
- Remove completed plate stacks from SAB, place right-side up on shelve
- The last plate poured becomes the bottom plate on the stack
- This plate has the highest potential for contamination
- Remove everything else from the SAB
12. Record batch number and pour date
13. Log any contamination incidents or deviations from protocol
Working with grain
Make Grain Spawn
Recipe: Oats x14 32oz Mason Jar
Materials and Supplies
- Whole oats, racing horse oats with the husk
- Tap Water
- Cooking oil
- Large canning pot
- 16qt colander
- PC
- Measuring Cup (2 cup)
Procedure
1. Bring 3 gallons of tap water to a roiling boil, use a lid.
2. Add 16 cups of oats, boil for about 75 minutes until splitting starts to occur.
Example Oats to tap water ratio
3. Drain to 16-Quart commercially huge fucking colander, wait 3 hours.
- Allow time to cool off, and partially dry.
- Stir occasionally to release steam.
4. Fill wide mouth mason jars 2/3 with oats. Install lids (with vent) + tin foil over the lids and tighten.
5. Add water to the PC
- Water level is 2-3 inches before adding the trivet and bottom jars.
- Add .5 cup vinegar to keep things clean and not fucked up looking
6. Load bottom row of 7 jars
7. Load top row of 7 jars
8. Install PC lid
- Lube the rim with cooking oil
- Evenly tighten
9. Bring PC to a boil, about 30 minutes
- Largest burner
- Gas stone heat dial between 5-6
10. Allow to vent for 10 minutes.
- Wait for steady steam stream
- Start 10 minute timer
- Reduce heat dial to 5
11. Add topper and bring to 15psi
- Keep heat dial at 5 until constant giggle
- Start 2 hour timer
- Reduce to 4, short-term
- Reduce to slightly over 3, long-term
- Goal of 1-4 giggles per minute
12. PC at 15psi for remaining 2 hours.
13. Turn off heat. Allow to come down to 0psi, about 30 minutes:
- Remove jiggler, allow to steam off
- Remove lid facing AWAY from yourself
- Remove jars and store tin foil (continue to re-use until you get tears / holes)
- Allow jars to cool, about 3 hours
Grain-to-Grain Transfer in a SAB
I don't do this because its a retarded waste of time.
Pretri dish cuts sent to grain (inoculation procedure)
The clamshell method is maintained
Procedure
- The 60mm petri dish is cut a total of 4 times, 2 horizontal, two vertical
- The outside 8 pieces are transferred to grain
- The center piece (oldest piece) is discarded to prevent jar stalling
Grain Spawn to Bulk
General ratio
200g coir + 3 cups water
400g coir + 6 cups water
800g coir + 12 cups water
Procedure
1. Fill pot with tap water, just under 12 cups.
- Add more or less water after field capacity tests
- Water should dribble and quickly stop when squeezed
2. Bring water to a rolling boil
3. Put coir in the bucket
4. Add boiling water
5. Close lid
6. Wait an hour and mix
7. Don't bother checking temps because it doesn't fucking matter. We're just trying to get things nicely separated and easy AF to work with.
8. Put the lid back on
9. Use the coir the next day. Mix it up very well because its going to be on the wet side.
- In my case its an absolute disaster to leave some hydrated bullshit in a bucket laying around. Fucking retarded.
- If field capacity is fucked, squeeze handfuls as you add to tubs on the fly
- If its too wet your going to stall your tub and risk contam
- If its too dry your flushes are going to suck ass
"Stalled" jars
Chalk marker measure
Use a chalk marker to mark the current colonization. Wait a few days and check to see if things moved. In most cases jars are not "stalling" they are just slowing down, enough to create an illusion that the jar is stalled and has reached contaminants.
Chalk marker wipes off fucking easy as shit.
The more jars in rotation you have the more reason to mark them.
Working with coir
Field Capacity Regulation and Check
I prepare my coil on the wet side and take from the bottom of the bucket where there is a coir tea.
Take a fist full with your dominant hand and squeeze lightly.
Use your other hand / thumb to press and make a pool. Press down for more or less depending on the project application. I prefer to go in slightly on the wet side.
Full Retro Top Fruiting
The yields produce a nice variety of growing stages. Good for consistent fresh tea or when ground up.
Healthy, questionable, contaminated all get top fruited in their jar depending on the life cycle of the active fruiting jars.
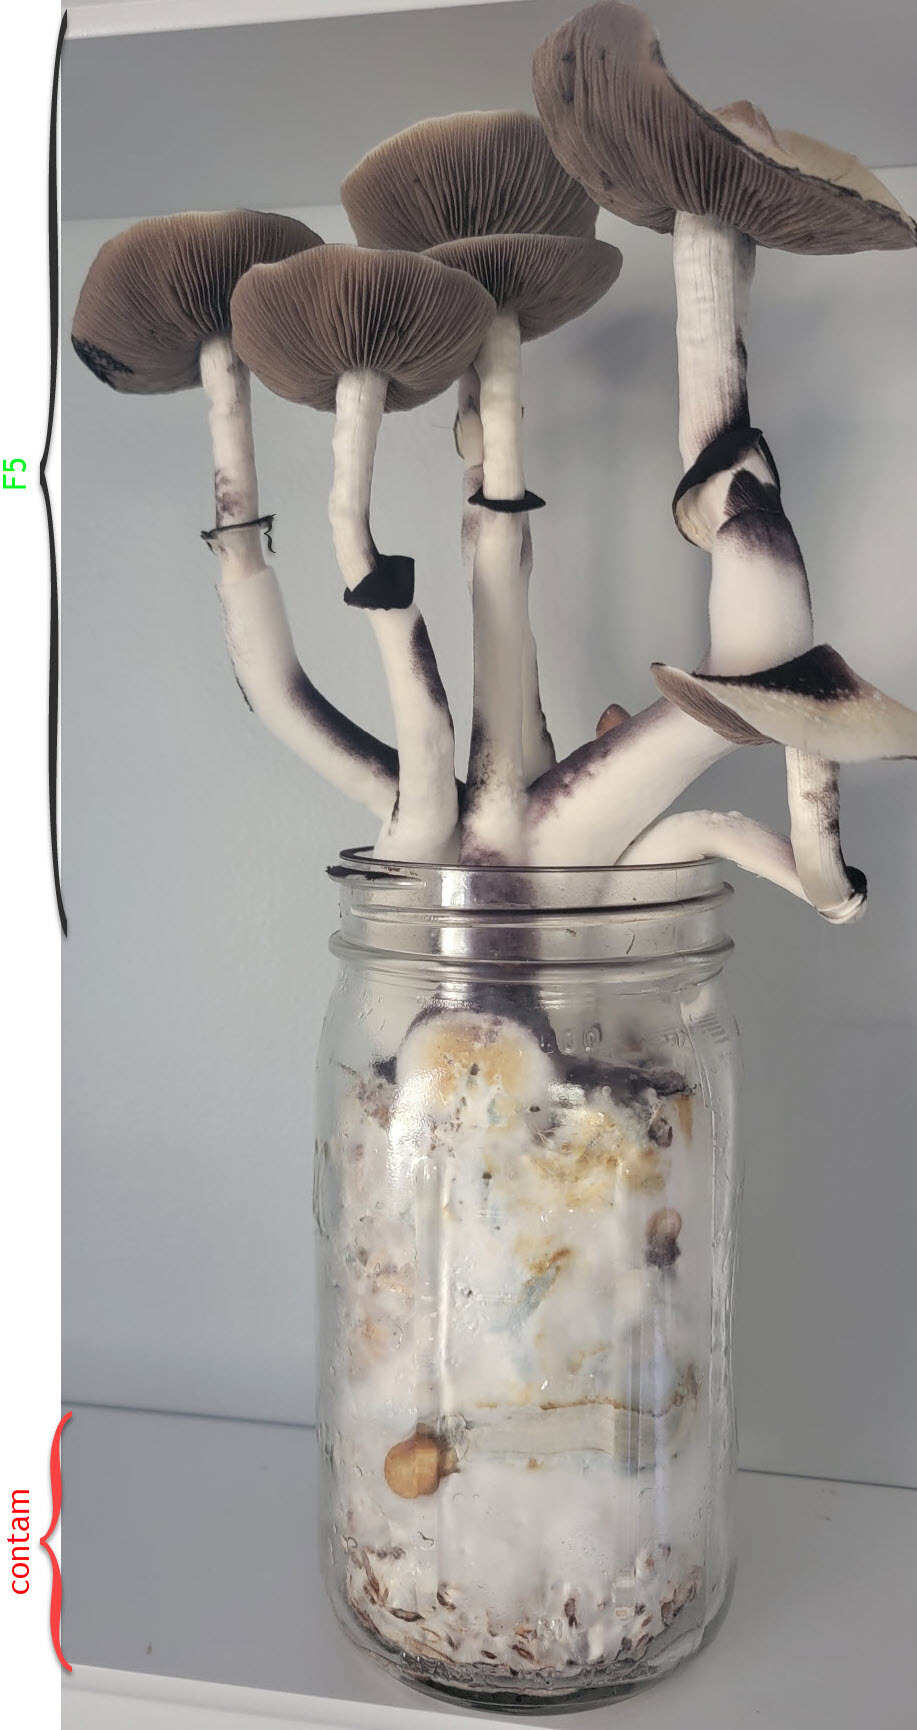
Especially useful for contamination below the top couple inches of the jar. The healthy mycelium colonates the casing and when fruiting pushes down and absorbs the contamination, enough to keep it at bay for many fruiting cycles.
Casing
Coir, field capacity squeezed on the dry side. Make a fire in your hands and cover the with a very fine dusting. Level again.
Working with totes
Bulk Stacking
Stacked directly on top of each other with the lid turned upside down. They live like this until F1, because peaking and misting just extends the grow cycle for no added benefits.
They are moved throughout the property depending on the current season. They live in the basement during winter months because the temperature is always 64 and I can add extra heat in a controlled way. I don't prefer too close to windows because mine are old and drafty.
Exception are exotics and species experimentation with subs with extremely dry field capacity. Moving from wet extremes to dry extremes between different project lines I can get a better understanding of what F1 looks like or if F2-? change in a genetic preferably way; where I then print the fucker.
Large tote cardboard inserts
Placing a strip of cardboard horizontal and center + one vertical and centered you can easily split the large tote into 4 smaller fruiting chambers.
Unmodified tub condensation and wiping
I aim for never touching tubs but depending on the location of the home and time of year sometimes condensation becomes a bit much and causes pooling on the sides. Pooling = mold = not desired.
When I need to wipe I use the same towel across all "healthy" tubs, wiping an inch or so above the substrate surface. For "questionable" tubs I try to not cross-contaminate and use a separate towel or disposable paper towel.
Printing
Prints on microscope glass sides
This method doesn't capture the full print unless a its a small mushroom cap. I prefer it this way anyways as I capture the corners of multiple mushrooms all at the same time. I then wipe the edges with ISO and I have a booklet print of that specific flush.
Prepare a glass booklet using ISO to sanitize along the way:
1. Create a binding using masking tape across the spine of two slides.
2. Place a temporary piece of masking tape over the lid. Outline the printing side with some masking tape.
3. Place a mushroom for print and a cup over for 12-24 hours.
4. Remove the temporary masking tape from the lid and close the lid.
5. Tape the remaining 3 edges.
6 Store in microscope slide case
Cloning and Field Cloning
On the homestead
Open air using Soap water. Clean and prepare working surface area, just get the shit out of the way. Place the the cloning specimen jar or tub on the work area surface. Things you should have prepared:
Scissors in ISO jar
Scalpel and bunsen
Prepared agar plate with the wrap off
Soap water bottle
Procedure
- Take the soap water bottle and put a fine mist into the air. The larger the surface area the better.
- Quickly in a fluent motion remove the scissors from the ISO and cut the specimen.
- Tear the specimen in half
- Heat scalpel until red hot
- carve out a very small piece, from the center of the fruit
- Clamshell the bastard into the agar plate
- Pretend T3 is T1, then proceed as normal
- Place a bunsen next to the agar plate and tearing workflow to increase success rates
In the field
When your in the field you look like a hipster but it works lol.
Procedure
- Depending on the hiking range I reduce both bottles down to 2oz bottles.
- Otherwise I use the regular fine mist sprayers because they are so fucking effective at dropping contaminants (soap bubble particles are smaller).
- Prepare your torch tool, I store mine in my mushroom foraging pouch lol
- Get close as you can to the specimen height.
- Lay down a piece of cardboard so you don't get wet as fuck
- Spray around the specimen with soapy water
- Next steps do really quick, don't worry you'll get the hang of it
- Mist into the air higher now to give your self a bigger window
- Torch the field scissors cut, tear, scrape specimen, clamshell to agar, wrap, repeat to new specimen.
- 3 is usually sufficient because your ninja skills are not always as fluent as you'd imagined in your head. I'm usually just high though. lol
- You can also build a SAB around the specimen depending on the rarity. hiking in a few pieces of small cardboard pieces is easy af and works great. Plastic works better but I like to recycle it back to nature and my pack gets lighter the more specimens collected.
Got some buddies? Arm them with soap water and have them do the hard work. Hilarious and it helps a fuck ton. Its a fun drinking game to see who's plates contam out lol
Drying Process
- How long is determined by the load in the dehydrator
- For immediate use that day, picked fresh, I dehydrate for [gradient:#ABA8A2,#]6[/gradient] hours. Cracker fucking dry.
- For later use I do the full 24 hours if fully loaded.
- 167f
Consumption Methods
Grandma's lemon tek tea
Nearing 10,000 posts with "lemon tek" in the subject its a fairly noisy topic.
Ingredients:
- The onset, peak, and offset is a smooth line
- Gut pain intensity is decreased or eliminated
- It's easy to dose grandma
- Taste is whatever you want instead of mush ass
- Less intense overall
Recipe
1. Grind up a bunch of previous dehydrated shrooms. I prefer 10g, grandma prefers .25-1g.
2. Place the ground up mush into a small bowl. Condiment bowls are nice.
3. Squeeze a fresh lemon over the mush bits. Mix. Make sure all the bits are submerged.
4. Wait 20 minutes.
5. At 20 minutes bring distilled water to a boil. The exact amount of water doesn't matter. Use distilled water, stop consuming municipal sediment and pill water folks.
6. Add 1 tbsp of honey, 1 tsp of sea salt. Let things come to a boil. Not a rolling boil.
7. Reduce heat to low. Add the mush mixture to a tea bag. Steep for 2 minutes.
8. Compress the bag into the tea to remove the moisture. Throw the bag way. Enjoy tea.
Potency is subjective
6 month study
Findings
I did a 6 month study on myself and I was able to maintain consistency throughout every trip no matter the harvest of B+. Every single trip was the exact same. Meaning the timing onset, peak, effects, insights and come down were identical.
The primary components are:
The secondary components are:
And the final component is:
Scientific studies testing for potency are fraudulent. People testing on themselves is subjective and in most all cases VERY poorly conducted. Most human beings simply do not have the will power to take the right measures on these studies. Until studies broaden categorically into different diets, talking about it is complete non-sense.
Edited by cardboardandsoap (10/25/25 10:22 AM)
|

 cardboardandsoap


 B Traven


 TheMagicalMushi

 1 2 all )


 Professer_Puke

 DannyBoy

 Threaded
 Previous
 Index
 Next


 Edit
 Reply